 Fra Noi Embrace Your Inner Italian


Last month, I promised I would write a column about “The Tree”. This is FamilySearch’s section where we’re all supposed to upload our data, and merge all the duplicates together, so that there is only one of each human being in “The Tree” with as much information about that person as we have all located. Let’s say for example that someone enters their great grandparents in The Tree but all they know is the birth years and the names. Then other people add the death year and the full birth date. Then someone else adds World War I draft information.
Since last month’s column, I attended an on-line session by Joel Cole, who works for FamilySearch with Italian records, so he is on the “inside” and can tell us some of what they plan to do. One of the plans is to use AI to get as much data from Italian records and then use that data to create more family entries in The Tree. The key is linking spouses to each other, and parents to children.
It used to take about one year for humans to read a film full of Italian records and index them by typing what they see into the master index. There are thousands and thousands of films, and though there are a lot of volunteers willing to index Italian records, it would take decades for all of it to be indexed by human volunteers.
AI can read and index a film full of records in 24 hours.
Is it more or less accurate than the human volunteers? It depends on whether the human volunteers are knowledgeable. It depends on whether AI can tell a lower case “a” from a lower case “o”. Let’s say the accuracy is not perfect either way, but AI is much, much faster.
Because they are using AI to generate ancestral and descendant lines in The Tree, you no longer have to hope that some other person is working on your ancestral lines. AI searches for everybody in a film. Volunteers may only focus on their town or their family. You can try to search for as many families as you want to, and you have a decent chance they might be found in The Tree. The only thing to remember is that The Tree does not allow us to look for living people, to protect against identity theft. A family may appear incomplete if it has only some of the children of your grandparents, not all of them, because some are still living.
So let’s look for one of my families. I really like to look for couples instead of individuals, because it helps narrow down who we are looking for. If we just search The Tree for “Francesco” “Giannelli”, we might get hundreds or even thousands of Francesco Giannelli’s to sift through. (Actually there are 54,000!) But if we search for Francesco Giannelli with a spouse Vita Rubino, we end up with one couple.
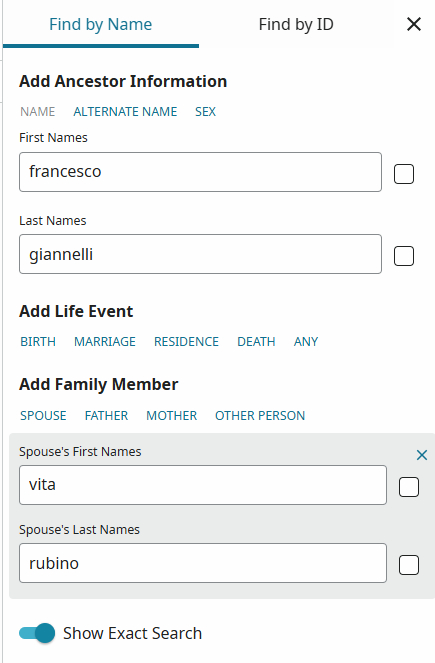
We still get 54,000+ results, but the one we want is at the top.
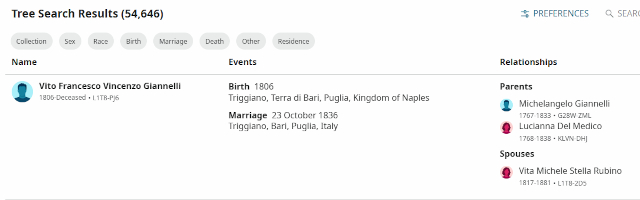
The relationships column is how you tell this person from all the others with the same or similar names. We can see that Francesco is not his first given name, but we see his wife is indeed Vita Rubino with two more middle names. We see he was born in 1806 and married her in 1836. There is plenty on this entry to determine if this is the right family or if this is two other people with similar names. To look at the details, you click on any name in the entry and it will show you that person’s basic details and several things you can look at.
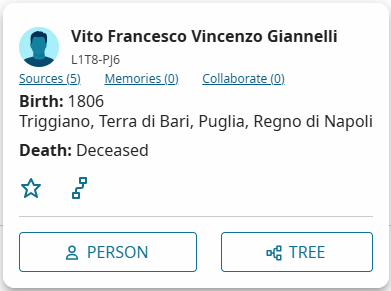
Under the name is a cryptic set of letters and numbers. This is a unique ID for that person. If someone else happens to enter this same person in The Tree again, because they didn’t know, it will have its own unique ID.
Then there are three more things you can choose. “Sources (5)” shows all documents that were linked to this person. (When you see a number in parentheses, such as the (5), it means that is how many items are in that section for this person.) More on this later. “Memories (0)” is a place to post photos, documents of your own, and anything else belonging to this person. “Collaborate (0)” is a place to connect to another researcher to go back and forth about data for this person.
The star is a way to “Follow” this person. If other people make a change to the record, and you have it “Starred”, you will be notified of these changes.
The relationship icon presumably tells you how you relate to the person you selected.
Below these, you see boxes with the words “Person”  and “Tree”
  . “Person” is more of a text based screen with a lot of places to make changes to a single person’s record, and then jump to a spouse, parent or child to make changes to them too. “Tree” is more of a visual picture of the family and which other families they connect to, and you can click on anyone on that screen and make changes to them while staying in the visual tree screen. Anything you enter while in “Person” or in “Tree” is the same – you do not have to enter it in both screens. Once you enter something in “Person” and then you view the tree that includes that person, that new entry will be there. Let’s explore both screens.
“Tree” shows the person you selected within a graphical tree.
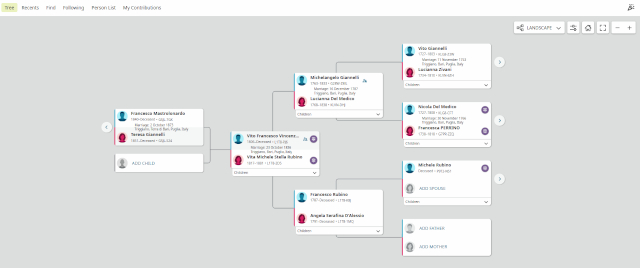
This is a tiny subsection of The Tree that includes your selected person, their spouse, some ancestors and some descendants. You may be saying “Dan, but my grandpa got married three times.” In this screen you can see the primary spouse, but you can change to a different spouse. See below.
The standard box on this screen shows one couple.
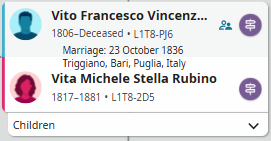
If you click on one of the names in this box, you’ll get a block on the right side of the page with data and most of the same things described above that you can click on.
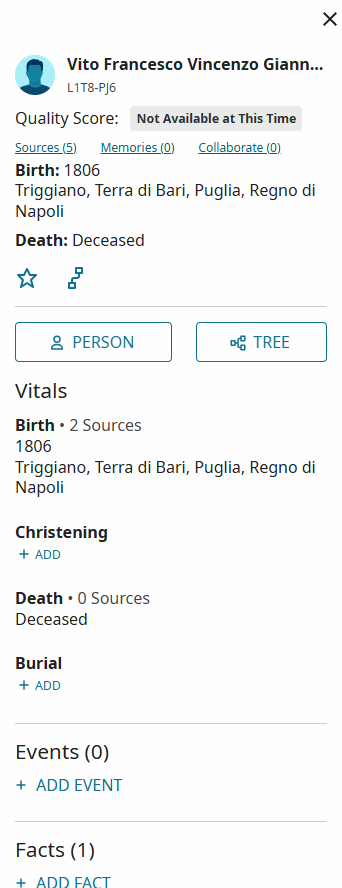
If you click on the ID, it copies it to the clipboard, and you can paste it elsewhere if needed. Keep this in mind – if you click on the name or anywhere else in the box, you’ll get that block on the right. If you happen to click on the ID, it will merely copy the id to the clipboard.
Then you have two more tiny icons. The left one will let you see other spouses. This screen does not typically show you all spouses of any individual – you have to select that spouse. When I clicked that icon, I got the following:
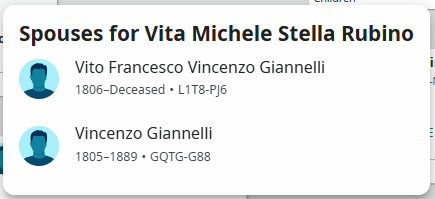
Hmmm. Look at these and they seem like they might be the same person duplicated, with a slightly different name. This is a hint that you may have two spouses of Vita that are actually the same person. This should be checked out. You may have two duplicate people to merge.
The purple icon tells you if there are research suggestions for that person. This will be described below.
Finally, at the bottom of the couple-box is “Children” where you can see all the children of this couple, and select one of them to be your focus for the moment.
There are some arrows < > that you can click to expand the family connected to that arrow. When you click a left arrow < on the left of a couple-box, it will show the children of that couple.
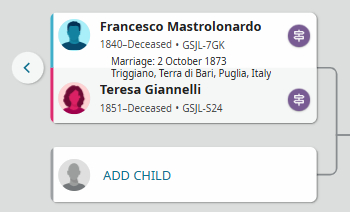
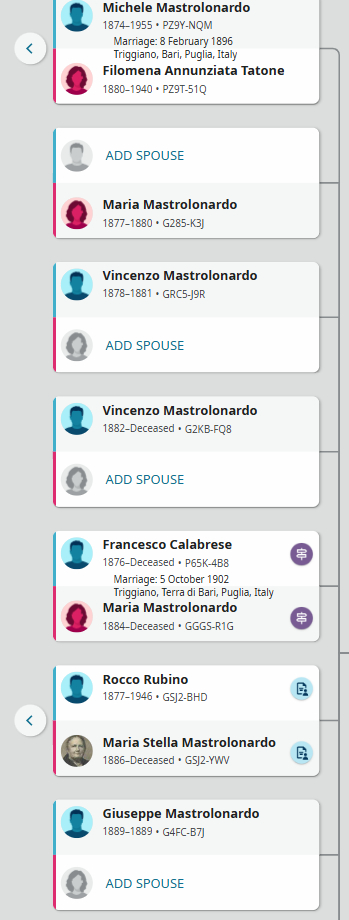
Now it added a generation to the screen that was already part of The Tree. Some of these children have their own left arrows to expand down another generation. If this seems cluttered, you can click the right arrow > between the many children and the original couple and it will make it look like it was before. By clicking these arrows, you are not changing the tree, just what is displayed on the screen.
The right arrows to the right of an ancestor couple will show another generation or two of ancestors. Clicking a left arrow < between couples will clear those ancestors from the screen and bring it back to the way it was before.
You might see boxes “Add Father”, “Add Mother”, “Add Spouse” and “Add Child”. This is where you can directly add people to The Tree connected to the person with the line going to that box. This occurs on the right side again. Type in what you know about these new people you are adding.
On your own, you can try some of the other options at the top of the tree screen.

These options on the upper left are for you to review your contributions to The Tree.

These options help you format how the tree looks while in this screen. You can experiment with these on your own.
“Person” takes you to a set of details about that one person, including who he is linked to. His parents, spouse(s), children are all listed on this page and can be directly viewed by clicking on them the same way you clicked on the original name.
Each section of this screen needs to be explained.
Let’s start with the person’s header info.

You see the person’s name, birth year/date and death year/date. Sometimes it just says “Deceased” because nobody has found the death yet. Next to that is the ID that uniquely identifies this person.
Below all this is “View Tree”, “View Relationship” and the Follow Star, which were already explained.
I never looked at the “About” until just now (yes I’m learning too!) and it generates a page that summarizes the life of the person based on the details that have already been entered. It includes a time line that includes historical events concurrent with the person’s life span.
“Details” takes us back to the good stuff from before.
“Sources” shows us a summary of FamilySearch documents that have been linked to the person. Typically a document is linked to one or more pieces of data. For example, if this person’s baptism record has his name as “Vito Francesco Vincenzo Giannelli” then that would be the source for the name, and the birth date and baptism date. A birth record of one of his children would be a source for his alternate name “Francesco Giannelli” and for the child’s name and birth date and birth place. In short, one document can be the source for multiple people and multiple facts, and a fact can have multiple sources, even if they conflict with each other.
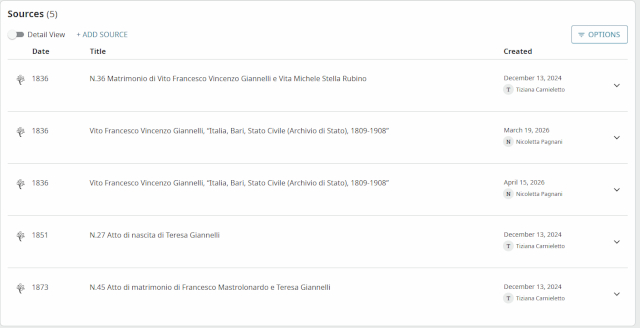
Click “Detail View” to see more detail about the sources.
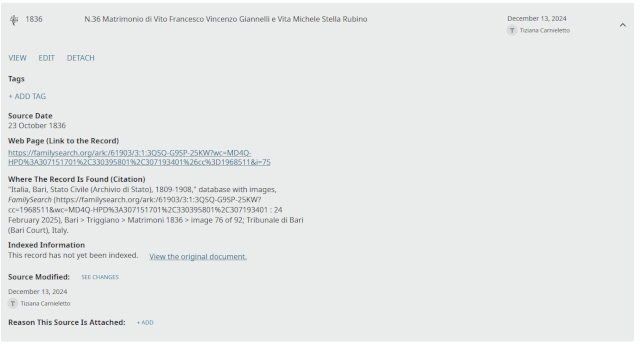
This is the detail for the first source above. A lot more to look at here. Most important is a link to the original document so you can see for yourself if the info is correct.
Under “Source Modified” you can see a date and a little photo or initial and a person’s name or user name. This is the FamilySearch user who linked this source to this person. You can click on that person and start a chat or messaging session to discuss the person and the source.
I’m going to skip Collaborate for now.
Memories would take an entire column to explain, so I must skip it too.
Time Line gives you the same time line that was in that “About” page.
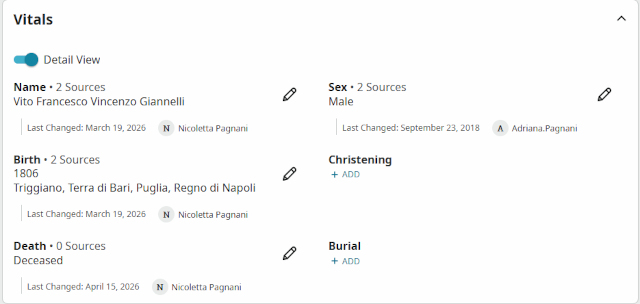
“Vitals” – This is the meat of the record – Name, Birth, Death, Sex, Christening and Burial.
Notice the pencils. Each one is how you edit or add information to the fact it is next to. Each one of these screens will be a little different, but it allows you to change the fact, and then you get a place to type “Reason This Information Is Correct”. You can type anything here you want, but you should keep it simple. “I was there the day she died.” “This is from his baptism but that record is not on FamilySearch – see Memories for a copy.” The person who last changed this record is shown. Again you can click the name and interact with them if they are on-line at the moment, or send a note for later review.
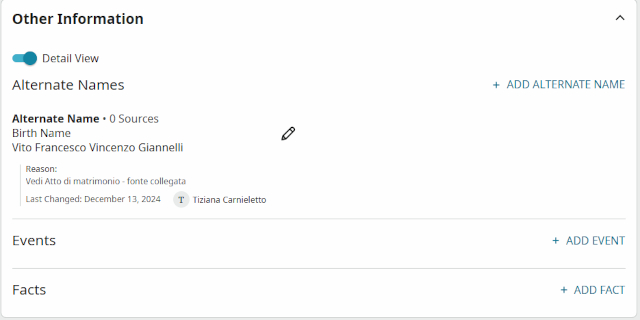
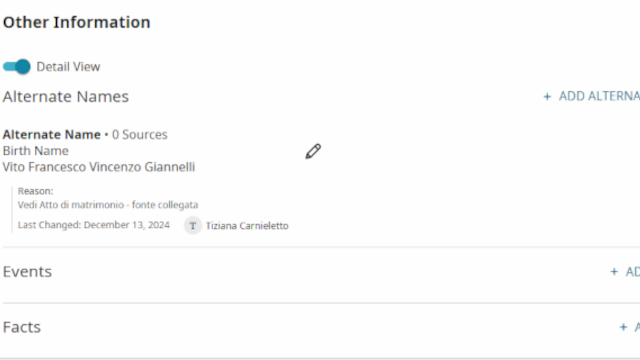
I have barely used this section. You can use alternate names here, so the record for Anthony Dominick Benedetto would have “Tony Bennett” as his alternate name. Events could be moments in the person’s life that are not vital records, such as induction/discharge from the Armed Services, schools attended, or becoming a citizen.
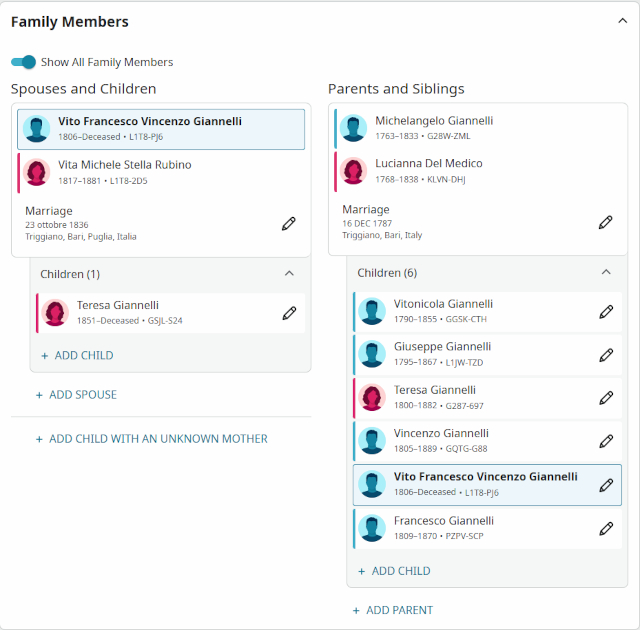
This is simple – spouses, children and parents are listed for this person. Click on that name to go to THAT person’s record. All the screens and sections will look the same.
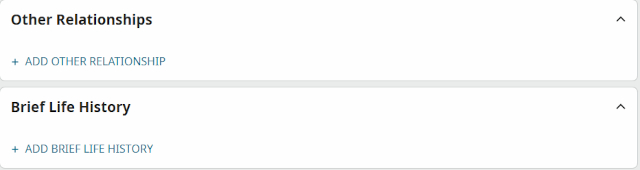
I have never used this. This is not where you might put a non-marriage partner. You would put them as a spouse even if they did not marry.
The “Brief Life History” is a place to write a short text biography to explain things that are not part of the vital record facts.
The columns on the right are helpful but you don’t really do much data entry there.
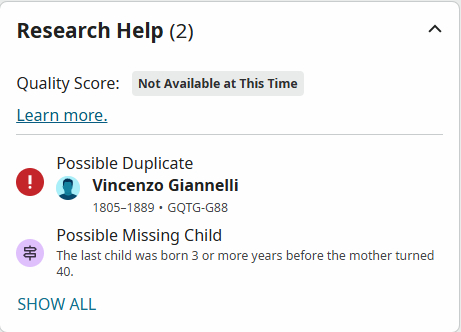
FamilySearch gives the record a grade for how detailed the sources are.
Possible Duplicate shows someone who might very well be another entry for the same person. The dates and spouse and children ought to be close enough for FamilySearch to suggest you review the match. Merging is a complicated process and we should leave that to the professionals.
“Possible Missing Child” suggests that there’s a gap between children that ought to be checked. It can be explained by the father moving to America for several years and thus he and his wife had no children. Or one of the parents died and no more children were born to the couple.
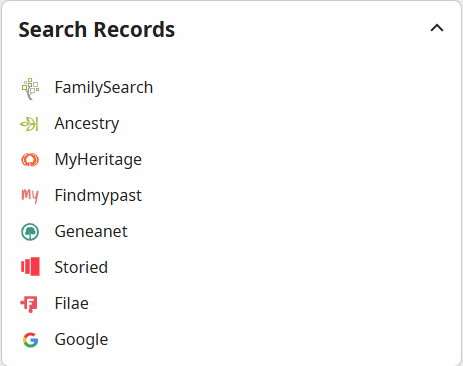
If you have paid subscriptions to the web sites on this section, you can see if those sites happen to have records that FamilySearch does not have.
If you have a problem with a source or some fact, you can type it in the notes.
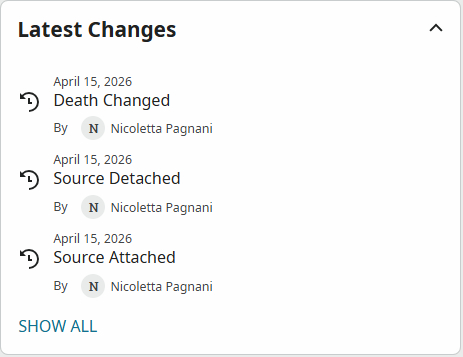
Every time a fact is changed or sourced, it is listed in this section. It gives you a nice list of the people who have taken the time to add or change data in this person’s record. These might be people worth contacting.
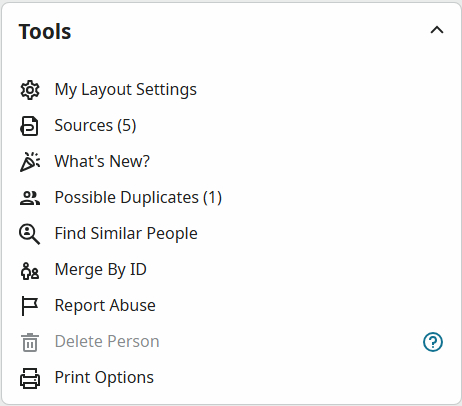
There are a few options here but let’s focus on only a couple.
Sources (5) is a list of all sources used on this person’s record. Everywhere you click the word Sources with a number after it, you’ll end up in the same screen.
These are FamilySearch records that have been attached to a person and some of their data. You should always check that source to be sure it is correct. Click on any one of the sources and you’ll get a detail screen and a chance to view the actual image.
The most important one is Print Options.
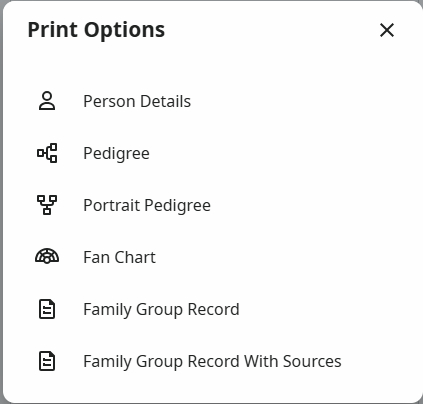
These are different ways to print data for your person (Person Details), parts of The Tree connecting to that person (Pedigree, Portrait Pedigree, Fan Chart) or a Family Group Record showing the person, spouse, parents and children.
This is all a lot to process. I had to skip large sections of The Tree because they are complicated enough to be another column or two, or a full presentation. Merging duplicate records is tricky even for experienced researchers, so it’s best that you avoid it if you’re relatively new to research.
If you are very new to The Tree, my recommendation is for you to search for people, navigate around, look at things, click on the many links I mentioned above, and don’t change anything.
Once you get more familiar, you can add your immediate family to The Tree and with any luck, connect them to an ancestral family that is already there.
If you have data you want to upload to The Tree, first use your genealogy software to create a gedcom file (.ged) and then go to google and search for:
“how do you upload a gedcom to Familysearch Tree?”
And follow the instructions.
Please send questions to d.niemiec@comcast.net and please put “The Tree” in the subject.