 When I first went to Salt Lake City years ago, I saw a rather elderly lady struggling to drag two large heavy carts of papers with her into the Family History Library. One cart bumped into the door, the other cart fell over. It was not a pretty site. As I rushed to help her, I thought to myself. “Self, make sure all your documents are portable and electronic so you don’t have to lug carts full of papers everywhere you go.” With scanners and cloud storage, you can carry any number of pages with you in a phone or tablet, or retrieve them from a library computer, and nobody gets hurt!
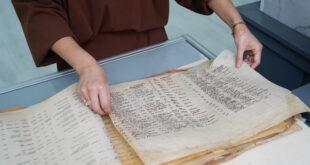
Once you have been researching for a while, you can easily build up a large amount of paper. If you print copies of birth certificates, death certificates, marriage licenses, census returns, and the multitude of other types of documents, you can end up with a lot of paper and a headache. You may have older copies of documents that you ordered by mail before the internet made it much easier. You may also have copies you made at libraries or family history centers on their reader/printer machines.
Today, it is easy to acquire many documents on ancestry.com or familysearch.org and save them to your computer. You may also have all that paper from the old days, or from documents that are not available on-line. This hybrid collection of resources can become a problem if you don’t come up with a good organizational scheme.
If you have half of your documents in computer files and half in paper files, it is inevitable that the ones you need to have with you are the ones you left at home. How do you remember which documents are in paper form? The easy answer is to scan your papers to digital so everything is in computer file format.
I know it is easy for me to spend your money for you, so I won’t recommend specific scanners. But I will tell you how I do mine so you can decide if it might work for you. I used to have a flatbed scanner in the past. Lay down a single sheet of paper, put the cover down. Click the scan button. Wait….for…..the….scanner….to…..go…..across….. Now open the cover, take out the paper, and put in another. Repeat until you give up!
Nowadays, some deskjet printers come with a document scanner. You lay a pile of 10-50 pages in the tray, press the scan button, and they feed automatically. The scanner can tell how large each page is and scan the correct size. Just make sure to take out any staples, paper clips, or major folds in the papers. They need to be as flat as possible to feed cleanly without jamming. It may not be quick, but at least you can put a stack of paper and leave it for a while.
There are many large copiers that feed and scan documents, and they work much faster than the home document scanner. If your copier at work can scan and e-mail, you could feed a stack of papers and scan them and retrieve the e-mail with the documents. If you have documents that are too large for a regular printer document feeder, you can scan the larger pages on a copier. Two important things to remember: 1) set the copier to save each page scanned as a separate file (JPG, TIFF, PDF) and 2) make sure you won’t get in trouble for using the company copier to scan your genealogy papers!!
When you have scanned a bunch of papers, you will have a bunch of files, probably named using some sequential numbers. SCAN0740.jpg, SCAN0741.jpg etc. There is no way for the scanners to read the contents of your paper and automatically choose the file name “Niemiec Walter Birth certificate.jpg”. When you have scanned a bunch of pages, you will have a folder, or a flash drive, with a bunch of files in it, and you have no way of knowing which of those files contains Big Nonno’s birth certificate. Therefore, the next essential step is to plow through that folder or flash drive and rename all the files to reflect what they contain.
When using Windows, you should right-click the filename of the first image, and click “Open With” and select “Microsoft Office Picture Manager” from the list. (I would suggest saving the files as JPG format. You’ll see why later on.) If you don’t have Microsoft Office, you might need to use Windows Photo Viewer. The file will open and you will now need to click “Edit” and “Rename”. You will see a tab on the right side of the screen which will allow you to change the file name.
Ok, this is the critical part. What should I name the file? You need a naming system that will be consistent so that all your files will be easy to figure out. I want to know A) who is on this document; B) where this document is from; C) what type of document this is. The date is important, but not for naming the file. I want to have a file name that includes all three above. Why? Let’s look at each item.
I want the person’s name in the file name so I can find the document based on my need for information about that particular person. I would recommend using the name of the person at the time the document was made. So use the maiden name when you save a birth certificate, but use her married name for her death certificate. This avoids confusion when your mind is on finding the death information on Vincenza Smith and you search for Vincenza Smith and it doesn’t find the file because you saved it as “Vincenza Tunzi” which was her birth name.
As we Italians know, we have a lot of relatives with the same name because the cousins are all named for their grandparents. So when I save a birth certificate for Giovanni Squeo, there might be more than one. In fact, the parents may have had more than one child with that name, if the first one died. So I usually save my documents with the person’s name and their years of birth and death, even if the certificate is only for one or the other. It helps me be sure that I am looking for the right person. So I would have a birth certificate for “Giampietro Domenico 1922-1923” and “Giampietro Domenico 1925-2004”.
This brings up a good point. Should I save first name then last, or last then first. I suggest Last name followed by first. I would avoid putting a comma in the file name just in case later you try to download a list of files and the commas cause problems.
I would also include the location in the file name. It might help split up the Illinois Iacobellis family from the Newark Iacobellis clan. Lastly, you should include the type of document in the file name. if you want to abbreviate “birth certificate” to “BC”, be my guest. Just be consistent.
Ok, so I have my first document and I have to change the file name from “SCAN740.JPG” to “Squeo Giovanni 1924-2008 Cook County IL BC.jpg”. Now at the bottom of the screen, there is a left and right arrow. Click the right arrow. It should save the file name change you just made, and load the next document. Lather. Rinse. Repeat.
Several hours later, you have 125 properly named documents of various types all in the same folder. Still looks like a mess. I’ll tell you how I organize mine, and you can decide for yourself a system that works for you. I made a folder called “Documents”. This is not the “My Documents” folder from Windows, or the “Documents” library. Maybe call it “Genealogy Documents” to keep it distinct. Within that folder, create a sub folder for each country. I have an “Ireland”, “Italy”, “Poland”, and “USA” among others. In each of those countries, create a sub folder for the type of document. “Birth Certificate”, “Marriage License”, “Naturalization Petition”, “Death Notice”, “Atti Di Nascita”, “Census” etc. Now search your folder filled with 125 images for all the “BC”. 26 birth certificates are shown. Now move those from the big folder to the “USA\Birth Certificate” if they are all American documents. I would name the Italian birth certificates a little differently to keep them separate from the American and Polish ones. “Liturri Vitantonio 1883-1953 Noicattaro ADN” tells you this is his Atti Di Nascita. Anyway, use these to move the newly renamed files to the correct folder based on what they are.
Ok, now that you have a well organized folder of documents, what do you do with it? This is my suggestion. Find a cloud service like Dropbox or Icloud or whichever one you want to use. Install it on your laptop or desktop computer. I only have Dropbox so I can tell you how it works. Dropbox sets up a folder called “Dropbox” on your computer, and anything I copy to that folder automatically copies to the cloud. First and foremost, this backs up all that hard work you just did scanning and naming all those papers! If your computer crashes, the cloud still has all your files. Copy your “Genealogy Documents” folder to the Dropbox folder. Now all your files are still on the laptop/desktop but are also in the cloud.
Now install the same program on your smartphone or tablet if you have one. Log into the Dropbox account the same as you do on the original laptop/desktop. You can now view copies of all your documents on your phone or tablet without having to lug the laptop, desktop or all those papers around. By having the files named using the Person’s name, years, location and document type, you should be able to find anything you need by using the search capability of Dropbox or whatever cloud service you choose. An important thing to remember is that not all cloud searches check the file tags. They only check the file name. So if you choose to save the file as “IMG452.jpg” and just plug all the details into the tags, the cloud search will not see the tags. Maybe someday they will, but I can speak for Dropbox in particular that it cannot search tags. If you get a lot of documents and the searching gets slow, just select the sub folder you need. “\Genealogy Documents\Italy\Atti Di Nascita” and then search for Zio Angelo’s birth. Now it won’t search every single document in your cloud, just the ones in the Italian Birth folder.
I glossed over the subject of which file format to save in, but let’s cover some pros and cons. You could save these files as PDF, JPG, TIFF and a host of other formats. You have to keep in mind the amount of space the files take, the quality of the image, and being able to open the file in a variety of different places. Most phones and computers can open PDF files, but they need to load Adobe Acrobat software to do so, which takes time. JPG and TIFF are both graphic formats. TIFF is the best quality but also takes the most space. JPG is much smaller but might not be the best quality. Keep in mind that you can only save tags in JPG files so if you want to use tags for any reason, you need to use JPG. The TIFF files may take up so much space that you run out of free cloud space and you’ll have to pay for it. If you have to have both portability (cloud) and quality (TIFF) you may need to save the TIFF on your laptop or desktop, and convert the TIFF files to JPG and only save the JPG files in the cloud. Keep in mind that every file you look at needs to load into your phone from the cloud, which eats data from your data plan and takes time. Maybe the smaller file is the better option.
You can use the cloud storage to save photos as well, to back them up so you don’t lose them, and so you can retrieve them anywhere you need to. If you run out of free space and have to pay, it is well worth the peace of mind that all your hard work is saved. Make sure to save a copy of your family tree data file in the cloud, too!
If you have any questions, send me an e-mail at italianroots@comcast.net and please put “Fra Noi” in the subject line. Have fun!
 Fra Noi Embrace Your Inner Italian


